Showing posts with label recipes. Show all posts

Tuesday, May 8, 2012

Sourdough trials

I have tried making sourdough bread a couple of times.  It did work, but it took so long to actually rise during the bread making stage that it became too sour to actually eat.  I am resistant to using yeast during authentic sourdough making!!  I just don't won't have it.  SOOOOO I found an old time sourdough recipe using unbleached white flour rather than the whole wheat I've been using.  I want to get the hang of this skill and if it means starting with an easier flour, I'm all for it.  Still, it will be better than store bought!

update:  Well I had to get off my high horse and use a little store bought yeast as my first attempt rose a little bit, but nowhere near enough to produce a pleasant loaf.  Now, that said, it did taste fine, but was rather flat and wide.  The boys came home and all had a slice or two of it, and the rest of it I simly cut into strips and made breadsticks to go with that evening's dinner.  A big hit!  I combined softened butter and a lot of granulate garlic, simply brushed it on with a pastry brush and popped the pan in the oven at 350* until done.

Today I did turn out a lovely sourdough loaf, using two different old time sourdough recipes as a guide, so here is how I did it, using unbleached bread flour this time along with a small amount of store bought yeast.  (That said I have plans to try again with no yeast, using potato water to attract wild yeast)  This recipe could also be made up quite quicker which was nice!

*note:  Use glass and wooden utensils, not aluminum,  steel or plastic


In a large glass mixing bowl or crock add:

4 Cups unbleached bread flour
4 Cups warm water (not too hot! just warm)
3  TBSP sugar

Mix very well with your wooden spoon of choice.  I let it sit out for about an hour to attract some wild yeast, and beat it again real good before covering and setting to a quiet space in my kitchen for 48 hours.

____________________________________

After the 48 hours this is what it looks like:


You can see the separation of the fermentation process.  Just mix the liquid back in gently until it is well incorporated again.

_____________________________________

Now we make the sponge.
Add to a large glass mixing bowl:
1 Cup starter
1 Cup warm water (not too warm) (add to it 1 tsp yeast, allow to sit 5 min, then incorporate into bowl)
1 TBSP sugar
2 Cups unbleached bread flour

Stir batter until no lumps remain with your wooden spoon.  Let this sit overnight.  This is what it looked like in the morning.

Now it's time to store the remaining starter in the fridge until it is next needed for more bread baking.  I put mine in a glass Pyrex measure/pour bowl and covered with Saran Wrap.  


Now to make your bread you add to the sponge:

1 Cup warm water (not too warm!) 
Add to the water, 1 tsp yeast --allow to set for 5 minutes and then add the remaining ingredients
3 tsp salt
enough flour to make a soft dough.  I personally used 4-1/2 Cups unbleached white bread flour.

Knead 10 minutes, until it's nice and pliable.  


Allow the dough set in bowl, covered with a kitchen towel,  at room temperature until doubled in bulk again.


1-1/2 hours later I cut the dough in half with a sharp knife, shaped into two loaves and placed on a baking sheet sprinkled lightly with corn meal.   Dust tops with a fine sprinkling of flour, and cover with kitchen towel.  Then I left undisturbed, covered with a light kitchen towel, to allow to rise once more undisturbed.


Preheat oven to 375*.  

Slash the top of the loaves gently with a serrated knife,  and pop the loaves in the oven immediately.  


After 35 minutes, check on the loaves and remove to cool.  Do not slice bread until it is completely cooled or it will be gummy inside.  


So that you could see the size of the loaf, I placed one on a dinner plate!


Here is a look at it sliced up.  :)
yummmm.....


___________________________________________

Now just simply feed your starter  

Add to the starter:

1 Cup mildly warm water
1 Cup unbleached bread flour
1 TBSP sugar

Stir well, cover and store in fridge for the next usage.  


Saturday, March 26, 2011

Hello Cupcake!


Today I decided to whip up a batch of chocolate cupcakes for the kiddos, they gathered the ingredients and put them away while I mixed it all up into a bowl of chocolately goodness....and boy does it look rich!   I am not eating any though, my friend's wedding is in 2 weeks from today and I am wearing a sleeveless dress!!!  I am not where I would like to be but I have come far, and am not screwing it up!!  My cousin's wedding is a month following my friends and I am wearing a dress a size down, finally, and it's shorter than I am used to so I am going to be very careful!  ;0)

Simple Chocolate Cupcakes


3/4 cup unsweetened cocoa

1 1/2 cups all purpose flour

1 1/2 cups white sugar

1 1/2 teaspoons baking soda

1/2 teaspoon baking powder

1/2 teaspoon salt

2 large eggs

3/4 cup water

3/4 cup buttermilk

1/3 cup vegetable oil or melted butter

1 tsp vanilla extract

1/2 Cup of dark chocolate, chopped (or you can use chocolate chips!)

Directions:
             
Preheat oven to 350F. Spray 24 cup muffin tins with Pam.

In a large bowl, whisk together cocoa, flour, white sugar, baking soda, baking powder and salt until thoroughly mixed.

In a medium bowl, whisk together eggs, water, buttermilk, vegetable oil and vanilla extract. Whisk into flour mixture until all of the ingredients are mixed in and no streaks of flour remain. Add in optional mini chocolate chips, if using.

Fill muffin cups evenly with the prepared batter.

Bake at 350F for 15 minutes, or until a toothpick inserted into the center of a cupcake comes out clean, or with only a few crumbs.

Remove cupcakes from the pan and cool completely on a wire rack before frosting.


And oh yes, if I am going to bother making cupcakes for the kidlets, I am going to pile the frosting high and swirly...and no, I am not a perfectionist! ;0) I used Wilton's Buttercream icing. It was super and thick and stayed where put!

Thursday, February 3, 2011

Low Carb Chicken and Beef Meals I am going to try this coming week

 I am tucking these away in my blog, as full recipes, with source, so that I will NOT lose them.  It will also be easier making my shopping list with it all laid out here.  They look like such winners, sure to help my family reach our goals!!  Tell me if you try any.


Creamy Southwestern Chicken
http://lowcarbdiets.about.com/od/maindishes/r/greenchilechick.htm

Ingredients:
  • 1 lb boneless skinless chicken breasts
  • 1/4 C minced onion
  • 2 cloves minced garlic
  • 6-8 oz canned chopped green chiles (depending on can size)
  • Optional: small amt of chicken stock or Better than Boullion
  • 1/4 C cream
  • 1/3 C shredded cheddar or jack cheese
  • Olive oil
  • Salt, pepper
Preparation:
1) Heat large skillet with oil.

2) Cut chicken into bite sized pieces and season with salt and pepper. Saute' till brown on both sides, adding onions about half way through.

3) Add garlic and cook for another minute.

4) If needed, deglaze the pan with a little water or chicken stock. Add 1 teaspoon Better Than Bouillon if desired.

5) Add green chiles and cream, and simmer until chicken is done and sauce is thickened.

6) Top with cheese, and serve when cheese melts.

Optional garnish: avocado slices; cilantro

Makes 3-4 servings

Nutritional Analysis for each of 3 servings: 4.5 grams of effective carbohydrate plus 1.5 grams fiber, 38 grams protein, 18 grams of fat, 347 calories.


Skillet Chicken Divan
http://lowcarbdiets.about.com/od/maindishes/r/chickendivan.htm

Ingredients:
  • 2.5 cups (or so) of chopped cooked chicken
  • 3 cups cooked chopped broccoli
  • 8 oz mushrooms, sliced, 1/4 cup chopped onion
  • 1/2 cup dry white wine
  • 1 Tablespoon Better than Boullion and 3/4 cup water, or 3/4 cup chicken broth and salt to taste
  • 1/4 cup heavy cream
  • 1/2 cup unsweetened soy milk (see note above)
  • 2 teaspoons low carb thickener such as NOTStarch or 2 T whole wheat flour
  • 1 teaspoon dried thyme
  • 1 teaspoon Worcestershire sauce
  • 3/4 cup walnuts, chopped (it's nice if you toast them, but not vital)
  • 1/2 cup shredded parmesan cheese
Preparation:
1) Saute onion and mushrooms in oil for 4-5 minutes.

2) Add wine and boil most of it away.

3) Add thickener. If you are using flour, cook for a minute or so before adding the rest of the ingredients.

4) Add liquids and seasonings. Cook, stirring occasionally, for 2-3 minutes. Add the rest of the ingredients except the cheese - you can mix that in or sprinkle it over the top and put the whole thing under the broiler to brown.

Nutritional Analysis: (with NOTStarch): 6 grams effective carb plus 6 grams fiber, 31 grams protein, and 400 calories.
.


Korean beef
http://lowcarbdiets.about.com/od/maindishes/r/koreanbeef.htm
  It can be marinated anywhere from an hour to overnight, and the strips of beef cook really quickly on the grill.  Suggested Side Dish: Asian Broccoli Stir-Fry
Ingredients:
  • Beef -- flank steak, sirloin, or your favorite -- cut in ½ inch strips or whole
  • For Each Pound of Beef, make the following marinade:
  • ¼ cup soy sauce
  • ¼ cup chicken broth (or water, the difference is subtle)
  • 2 Tablespoons artificial sweetener (or brown sugar -- not much of it probably actually gets into the meat)
  • 2 Tablespoon sesame oil
  • 1 teaspoon black pepper
  • 1 teaspoon fresh garlic or ½ teaspoon garlic powder
  • 1 teaspoon fresh grated ginger
  • 2 green onions (scallions) chopped
  • 1 Tablespoon sesame seeds (optional)
Preparation:
Cut the beef into half-inch strips if the butcher didn't do it for you.   Mix the marinade ingredients up, and put the meat in. Marinate anywhere from an hour to overnight. If you use artificial sweetener, consider adding just a teaspoon of dark molasses for flavor.

Grill quickly on a hot grill.

There is no carbohydrate to speak of in this recipe if you use the artificial sweetener. It's hard to tell with sugar in a marinade how much gets in.


Chicken or Beef fajitas
http://lowcarbdiets.about.com/od/maindishes/r/beeffajitas.htm
Ingredients:
  • 1.5-2 lbs skirt steak or other beef or chicken easily cut into strips
  • 1 medium onion, sliced, or 15 medium scallions (green onions) - same amount of carb!
  • 2 large Bell peppers, sliced - two different colors is nice
  • 1/4 cup soy sauce
  • 1/4 cup lime juice
  • 1 teaspoon chili powder
  • 2 Tablespoons oil
Preparation:
1. Combine soy sauce, lime juice, chili powder, and oil. If grilling, save a couple of Tablespoons aside to toss with the vegetables.

2. Slice the meat into about 1/2 inch slices. If using skirt steak, flank steak, or other meat with an obvious grain (lines through the meat), be sure to cut perpendicular to the grain, or you will be chewing a very long time. (Think about it - you want to create a lot of short fibers, not a few long ones.) How to Cut Meat Against the Grain

3. If cooking in a skillet, marinate everything together in a bowl or plastic bag (a zip-type works well). If grilling, marinate the meat and veggies separately. Even a few minutes helps, up to 2 hours is great.

4. If grilling, remove from marinade and grill.

5. For cooking in a skillet (preferably regular, not nonstick), cook the meat first (it will probably take two batches, depending upon your pan). Add a little oil to the skillet and get it very hot (the oil will shimmer). If you don't get it hot enough (or crowd too much meat in), the meat will steam instead of browning. When the meat is browned, remove and add veggies. When they begin to soften, return meat to skillet to heat through.

6. Serve with salsa, sour cream, cilantro (if desired) and guacamole. If low-carb tortillas are available, that is a nice addition, but a fork works fine.

Serves 5

Nutritional Information:Meat and vegetables, with 1.5 pound skirt steak and green onions, have 4.5 grams of effective carbohydrate and 2 grams of fiber, 28 grams of protein, and 307 calories per serving. The marinade could add as much as 1 gram of carb (the whole recipe has 5 grams), but obviously not all of it makes it to the table.


Meatloaf 
---your favorite recipe minus the bread crumbs....can use crushed up pork rinds if desired


Lunch Ideas
Deviled eggs or egg salad
Chicken salad with bed of greens (baby spinach or romaine) and walnuts
Tuna salad occasionally (be careful for mercury exposure)
Stuffed bell peppers (use riced cauliflower in place of white rice)
Huge chef salad with full fat ranch (yeah!!)
Buffalo chicken salad (the chicken will NOT be breaded so it won't be quite the same, but I'll make do and the ranch will make up for it..hehe)
meatballs with sauce and cheese and a green salad


Breakfasts
Coffee with:
Fried eggs with cheese and sausage
veggie and cheese Omelettes
Pizza Omelette (mozzarella, green pepper, onion, pepperoni or hamburger)

farmer scramble (minus potatoes) with salsa
any dinner or lunch leftovers =)

Tomorrow I go shopping and will have a very happy kitchen!!

I have a wedding I am a bridesmaid for coming in April.  I've got about 7 weeks until my dress comes in and I am measured for alterations.  I hope to be down 20 lbs. by then. 

Tuesday, February 1, 2011

~Black Forest Cake~


Oh I am so glad you stopped by!  Come on in out of the cold, let's set your things by the fire to dry and warm up.  Here's  a cup of coffee and an apron, I was just setting up to make a very easy lovely cake for our family's dessert this evening.  This recipe idea was given to me by my internet neighbor and friend, Connie.  Could you hold this camera for me and take a couple shots as we go along so I can share this with some dear friends online?  Thank you so much.  It's great having an extra pair of hands, and some girl talk besides!!


See this lovely bowl, isn't it old fashioned looking and simple?  I am drawn to that type of style.  I love everything retro, vintage or farmhouse.

Preparing for the evening's meal early on in the day while I have some quiet time when the home is still has become a helpful habit.  This way when the day's activities are at its peak, I am not running around trying to do too many things at once.   Attention, care and prayers can  be put into the meal.  The salad's been made,  and is covered in the ice box.  The dry ingredients for our baking powder biscuits have been mixed,  in that covered bowl on the counter.  All that needs doing come supper time is to add the milk, flatten out, cut and pop them in the oven.

Speaking of oven, I will set my oven to 350 degrees now, so that by the time the cake is ready to go in, it will be ready at the proper temperature.  That is an important step to any baking.

I suppose that is enough gabbing, now onto the recipe.  This really couldn't be any simpler.  It's simply a devil's food cake mix, 2 eggs, and a can of cherry pie filling.  Let's pour these each into the bowl, and I will mix it up with my old fashioned wooden spoon.


You know, this would be a good recipe for when company is coming, or you are pressed for time, but want to have something simple yet lovely to take to your dinner party.


Would you hand me that orange Spoonula over there?  Thank you.  I love using this to scrape every last bit of batter from the batter bowl.

You could also just make this in a retangular pan.  This cake will not come out perfectly flat and smooth, it has a more rustic look to it, which is part of it's charm.   

That's all there is to it!  Now in half hour or so I will test it with a toothpick or knife to be sure it is fully finished, and let them cool.  I think this will be great as is, or with my favorite, a huge dollop of sweetened home whipped-cream.  It's really your preference.  Get creative in your kitchen. 


Recipe 
 
Ingredients:

devil's food cake mix
1 can of cherry pie filling
2 eggs

Directions:
Into your favorite bowl pour the cake mix, cherry pie filling and 2 eggs.  Mix up good with fork or your best stirring spoon.  Scrape with your silicone spatula into well greased cake pan/s, and bake at 350 degrees for about half an hour.  Toothpick test to be sure it's done.  Cool.  Flip into best plate or serving dish, or if using large rectangular pan, just serve from there.  Be sure to have plenty of fresh whipped cream to dollop on top.  Enjoy!

Wednesday, January 5, 2011

More menu ideas for this upcoming week from the Today show!

Recipe: Broccoli stir-fry with chicken and mushrooms

Mark Bittman
Ingredients
  • 2 tablespoons vegetable oil
  • 2 tablespoons minced garlic
  • 1 tablespoon minced fresh ginger
  • 4 scallions, chopped
  • 1 pound broccoli, trimmed and cut into bite-sized pieces with the stems no more than 1/4-inch thick
  • 8 ounces button mushrooms, cleaned, trimmed and sliced
  • Salt
  • 8 ounces boneless, skinless chicken breast or thighs, cut into 1/2- to 3/4-inch chunks or thin slices and blotted dry
  • 2 tablespoons soy sauce
  • Freshly ground black pepper
Preparation
Put a large, deep skillet over medium-high heat. When it's hot, add half the oil, swirl it around, and immediately add half the garlic and ginger. Cook for 15 seconds, stirring, then add all but a sprinkling of the scallion, and the broccoli and mushrooms. Raise the heat to high, and cook, stirring, until the mushrooms release their water and the broccoli is bright green and beginning to brown, 3 to 5 minutes.
Sprinkle with salt and add 1 cup water. Stir and continue to cook until almost all the liquid evaporates and the broccoli is almost tender, another minute or 2 more, then transfer everything to a plate.
Turn the heat down to medium, add the remaining oil, then the remaining garlic and ginger. Stir, then add the chicken and turn the heat to high. Cook, stirring occasionally, until the chicken has lost its pink color, 3 to 5 minutes.
Turn the heat down to medium, return the broccoli, mushrooms, and juices to the pan, and stir. Add the soy sauce, sprinkle with more salt and some pepper; add a little more water if the mixture is dry. Raise the heat to high and cook, stirring occasionally, until the liquid is reduced slightly and you've scraped up all the bits of chicken. Taste and adjust the seasoning, garnish with the remaining scallion, and serve.
Serving Size
Serves 4


Recipe: Chopped salad
Mark Bittman
Ingredients
  • 2 tablespoons or more white or red wine vinegar
  • 1/3 cup extra virgin olive oil
  • 1/4 teaspoon minced garlic, or more to taste
  • A large pinch of salt and a smaller one of black pepper
  • 2 celery stalks (preferably from the heart), chopped
  • 2 carrots, chopped
  • 1 small red onion, minced
  • 3 or 4 radishes, chopped
  • 1 red or yellow bell pepper, cored, seeded, and chopped
  • 1 small cabbage, cored and shredded
Preparation
Combine the vinegar, oil, garlic, salt, and pepper in a salad bowl beat with a fork.
Add the vegetables, sprinkle lightly with more salt and pepper, and toss. Taste and adjust the seasoning, and serve immediately.
Serving Size
Serves 6

Wednesday, December 8, 2010

Come, enjoy a cookie!

A couple of years ago I attended a cookie exchange party and my friend, Jenn,  made some caramel apple cookies that I begged her to give me the recipe for.  They were so unique and delicous, my favorite cookie of all.  I typed it up at cooks.com and figured I would pull them out to have a cookie baking session this week. 

Another yummy cookie I am surprised to even like is the no bake cookies  My friend, Sheila, brought these last year to a cookie exchange party I hosted.  Can you believe I had never had one before?  I love the sweet and salty blend these cookies give.  There are many variations to this one, but I chose one that looked most similar.

I have never really made the roll out type of cookie dough.  I am not much of a decorator, but may try one this year.  Sounds like a fun activity for the kids to get involved in.  And some for just mommy to try her hand at as well!  ;0)

What is your favorite cookie recipe?

Tuesday, December 7, 2010

Peppermint Hot Chocolate, a family favorite

This is a repost from a blog I wrote in 2005. Enjoy!!
If you haven't tried this, you're missing out! Since this is dh's only weekend off we are celebrating all weekend. This recipe came from a Big Y supermarket magazine they give out free. It didn't sound all that great, until we TRIED it. YUUUUMM! See the picture for the finished result.

Ingredients:
2 cups whole milk
2 cups heavy cream
8 oz. white chocolate morsels
1/2 tsp. peppermint extract
-red food coloring (optional)
-prepared whipped topping
4-6 peppermint sticks or candy canes

In a medium saucepan over med-low heat, heat milk and
cream to a simmer, stirring often. Mix in Chocolate.
Whisk until chocolate is melted and smooth. Add
peppermint extract and stir. Slowly add food
coloring, a couple of drops at a time, stirring
between additions until desired color is reached.

Pour into mugs and top with whipped topping; garnish
with whole peppermint stick or candy cane.
4-6 servings yielded

Tuesday, October 26, 2010

~Make your own mix: Cocoa edition~

Today I am mixing up a simple dry hot cocoa mix. The packets are only a dollar for 10, but I've got 5 children here, so they are gone in no time. Now this mix here is really a deal! I can make it once and have it last quite a while, no need to throw it in my cart each week. I really enjoy being able to "make my own groceries" when possible out of simple ingredients that I can stock up on. I was really into that a couple years back and have lost my gusto, though I am getting it back. I am stocking my pantry for the winter and holidays and I feel such satisfaction from that. This mix is from Alton Brown on Food Network.


Hot Cocoa


Recipe courtesy Alton Brown


Serves:


5 1/2 cups dry mix


Ingredients


* 2 cups powdered sugar
* 1 cup cocoa (Dutch-process preferred)
* 2 1/2 cups powdered milk
* 1 teaspoon salt
* 2 teaspoons cornstarch
* 1 pinch cayenne pepper, or more to taste
* Hot water


Directions


Combine all ingredients in a mixing bowl and incorporate evenly. In a small pot, heat 4 to 6 cups of water.


Fill your mug half full with the mixture and pour in hot water. Stir to combine. Seal the rest in an airtight container, keeps indefinitely in the pantry. This also works great with warm milk.

Another fun thing to do is top with some whipped cream and lightly dust with cinnamon or nutmeg.  My children love it when I let them have a candy cane to stir their hot cocoa with during the holidays.  What a rich treat, and it thrills them so.  

P.S. To make it easier to stay in line with my WW points I buy myself the Swiss Miss fat free packets.  It lasts a lot longer when just for one or two.  ;0)

Tuesday, October 19, 2010

Comfort Food and a Real Eye Opener!

Cube Steaks with country gravy


I totally realize this is a high point recipe, and considering my new journey with Weight Watchers and all, my sharing it may leave one confused. However, I had some cube steak to use and this is what I came up with and it was so wonderful!

First I got out a huge skillet and heat up some oil in it.

Next, a medium sized mixing bowl was set on the counter,and some flour was dumped into it.

I dredged the cube steaks into the flour to coat both sides and placed them in the hot skillet. I browned both sides, on the second side I sprinkled the steaks with some granulated garlic. This was done in several batches since we have a large family to feed. Remove and just tuck them away someplace warm. I found the freshly cooked ones kept the underneath ones warm just fine.

Now you just take about 1 Cup of flour, and some pepper to taste. I used quite a bit of a gourmet quality pepper that I bought at a meat store. It wasn't as fine, and had a bolder bit, perfect for a pepper lover. I added some Kosher salt to the mix.

To the brown bottomed pan, I splashed in some more oil and using a whisk I loosened the bits up from the bottom of the pan . In went my flour concoction, whisking away, making a paste with the oil. I whisked it and allowed it to cook a short time to develop a brown color. Then I added about 1-1/2 Cups of milk. I set the heat to low and whisked while it quickly thickened right up to the gravy consistency I wanted. I then removed the pan from the heat and added the steaks back to the gravy-laden pan.

MAAAAAAN was this good stuff! I had also "baked" some potatoes in the microwave to go with this and some veggies. This is something I won't indulge in often, but will definitely keep in the "comfort files."

Now at this point, one may be wondering, what is all this eye opener talk about?? Well!!! We all know and expect that those fancy coffees and lattes at places like Starbucks topped with fluffy mounds of whipped cream are high calorie and to be avoided. Of Course!! But would you necessarily assume that of a "normal" coffee at say Dunkin Donuts? I have to be honest, I did not.

I LOVE their pumpkin spice coffee. I love to drive up, order a large pumpkin spice coffee with half and half. Until the other day, when I looked up the nutritional info on the Dunkin site, and plugged it into the points calculator online. WELL I'LL BE! 8 points. That's right EIGHT! As in 8!! That's the amt of an average hearty meal on WW plan. It is a sad sad day when I realize that must come to an end. Also, since I learned this, when I do have one it now sets the tone for the whole day, so it must be stopped! Not saying I'll never have one again, but it must be a treat and not a regular thing. BOO!!!

Saturday, October 16, 2010

~Get more Omega 3: Salmon Recipe~

I joined Weight Watchers last Wednesday. I certainly know about good nutrition, and I know the hows when it comes to losing weight, I've certainly done it enough times. The missing key for me I believe is the social dimension of going in person to a meeting, hearing stories you relate to, tips and ideas, makeover recipes for seasonal/comfort foods, tracked weigh ins and incentives etc,... I have a good feeling about it. I also desire to get more Omega 3 in my diet, and really don't want to have to choke down pills to do so, hence more salmon in our diets from now on. We tried this recipe and LOVED it. So simple, easy and flavorful.


Salmon with Molasses and Mustard

INGREDIENTS
2 Tbsp brown mustard (I have also used Dijon to good result)
1 tsp lemon juice
1 tsp molasses
4 salmon steaks, about 3/4 inch thick
seasoned bread crumbs
1 Tbsp olive oil

INSTRUCTIONS

1. Mix the mustard, lemon juice, and molasses together and brush the mixture over the salmon steaks, then dredge the steaks in the bread crumbs.
2. Set fish on a rack for ten minutes.
3. Heat the olive oil in a nonstick pan over medium-high heat.
4. When hot, cook the steaks for about five minutes per side, until the salmon has browned and flakes easily.

Serves 4.

Monday, October 4, 2010

~Pure and delightful apple pie recipe~


Apple Pie by Grandma Ople from allrecipes.com

"Grandmas from all around can be proud of this unique recipe that brings fabulous results. Sliced apples are mounded in a prepared pie shell, covered with a latticed crust, and just before slipping into the oven, doused with a sugary butter syrup."

Ingredients:
1 recipe pastry for a 9 inch double crust
pie
1/2 cup unsalted butter
3 tablespoons all-purpose flour
1/4 cup water

1/2 cup white sugar
1/2 cup packed brown sugar
11 Granny Smith apples - peeled, cored
and sliced

Directions:

1. Preheat oven to 425 degrees F (220 degrees C). Melt the butter in a saucepan. Stir in flour to form a paste. Add water, white sugar and brown sugar, and bring to a boil. Reduce temperature and let simmer.
2. Place the bottom crust in your pan. Fill with apples, mounded slightly. Cover with a lattice work of crust. Gently pour the sugar and butter liquid over the crust. Pour slowly so that it does not run off.
3. Bake 15 minutes in the preheated oven. Reduce the temperature to 350 degrees F (175 degrees C). Continue baking for 35 to 45 minutes, until apples are soft.


WOW I was struck right away how different this apple pie recipe really was! However, the thousands! of reviews made it irrisitable to give it a whirl. I really must admit I struggled to NOT add the usual cinnamon or allspice, yet I followed the recipe to a "T" and I have to say I am SO glad that I did. This pie-- so simple, so pure tasting, buttery and appley, tasted like something straight off of grandma's farmhouse window sill. REALLY. Give it a try.

Saturday, September 18, 2010

When the harvest comes in, can some salsa!


This is a salsa recipe I found online and have used for a couple years now. We love the fresh taste of this when cold packed, so GOOD! I use a HUGE 13 qt stainless steel bowl for this recipe.

About 6 pounds chopped tomatoes
About 2 pounds chopped green bell peppers
About 2 pounds chopped onions
2-5 hot peppers, minced (homegrown ones tend to be spicier so use your best judgement)
2/3 c. apple cider vinegar
2/3 c. fresh lime juice (about 4 limes)
lots of fresh chopped cilantro, to taste
1 tablespoon of ground cumin, or to taste
1 tablespoon (or more) of moist grey sea salt


Here's how I do it: First I pick everything...the tomatoes, bell peppers, hot peppers and cilantro all come from our garden, and this year since we don't have a garden, when the harvest comes in faster than the farmers know what to do with it and the price drops as low as it's going to go, I will buy it then. ;-)

Next, I core all the tomatoes and then I chop them in batches in the food processor...I just pulse the processor 3-6 times depending on how small I want the chop to be.

Then I put them in a big colander to drain the juice off.

Next, I process the bell peppers and put them in a BIG bowl.

Then I process the onions and hot peppers together.

Then I add the chopped onions and hot peppers to the bell peppers in the BIG bowl.

By this time the tomatoes should be drained enough (save the juicee for some yummy drinking later on!), add them to the big bowl along with the vinegar, lime juice, the cilantro, cumin, and the salt.

Mix Well!

We prefer the taste of a raw pack method, if you want you can cook the salsa, boil it for about 10 minutes and then put it into jars :-) Ladle Salsa into hot sterilized jars and leave 1/4 inch head space. Add the 2 piece lid and process for 30 minutes using the boiling water canning method. Yield: 3 Quarts

Wednesday, September 15, 2010

Fall Means the Oven is Back in Business

Very happy to have comfortable weather enough to once again employ the oven without wilting the entire household, I eagerly prepared some sandwich bread (we had none) along with cinnamon rolls for breakfast yesterday morning. The two littlest boys slept until almost 10 o'clock in the morning, much to my surprise!! As soon as the rolls were almost ready to pull out, the aroma roused them out of beds and beckoned the two downstairs. Their faces alight with merry surprise, they watched me slip the pan from the oven to the stovetop to cool. Below, is my roll making in pictures. ;-)


Start by rolling your dough out into a thin oblong shape


Spread the sauce all over top surface of the rolled out dough


This is the way we roll them up..roll them up..roll them up..


all rolled up nice and snug


all prepped, just after spooning extra sauce to the tops, and ready to rise


fully risen and ready to go into oven


fresh out of the oven


To make cinnamon rolls, take a basic bread dough recipe:

Basic Bread Dough
Yields:3 loaves

3 cups comfortably warm water
2T yeast
1/3 cup sugar
1/3 cup olive oil
1 TBSP salt
9 cups flour

I set this in my Bosch kitchen system on level 1 for a couple short minutes to knead. You can also knead by hand.

Then divide dough into 3 equal amounts. I usually make 2 loaves of bread and 1 batch of cinnamon rolls, but you may do it differently depending on your needs. I take the 2 portions and allow to rise covered, until doubled in size, in a place free of drafts. When risen, punch down, shape into two greased loaf pans and allow to rise a second time while you prepare and rise the cinnamon rolls. At the end, they can all go in the oven together, though the bread loaves will take an additional 10 minutes than the rolls.

Now onto the rolls:
Start a stick of butter to melt on low heat in a small saucepan. Add some brown sugar and cinnamon once it begins to melt and stir until dissolved and uniform. I then take my single portion and roll it out very thin in an oblong shape on a sparsely floured surface (to prevent sticking). Spread a good amount of the sauce all over the surface of the bread dough.

Prepare a lasagna type oblong pan with cooking spray.

Be aware: This will be a messy job! Roll up tightly as you can, length-wise as in the pictures above until all the dough is rolled like a carpet ;) Then slice in about 20-26 slices. I use an extremely sharp knife so that I can cut without flattening. I've also seen it done with floss. You can "loosely tie" the floss around the roll and pull to slice each portion from the roll.

Gently place the rolls into prepared pan and allow to rise in a warm place. I then spoon some of the leftover sauce atop each roll. What I do is preheat my oven to 350 degrees, and set the pan of rolls in the microwave above my stove to rise in a warm and safe place. In about 30 min. they will be risen, and you may pop them into the oven to bake for 20 min or until golden brown. Serious. Yum.

You could glaze with maple syrup, but I leave as is. They don't last long enough with the 8 of us to dry out.

Friday, August 20, 2010

Donut Holes


This is the third recipe of Jonni McCoy's, and the last for some time, that I'm blogging about. I returned the book yesterday, but not before taking a can of biscuits (the small, cheap variety), halving each one, frying them very quickly, for mere seconds on each side in very hot oil. I removed them to a paper toweled plate, then dipped and rolled in a bowl of cinnamon sugar. In no time at all we had a delicious and completely addicting snack for the whole family, 12 servings in all for $3. Not too shabby at .25 per serving, eh? I have to say, good as these were, it's not something I plan on making very often if at all. They seriously sent the kids into cravings, and myself. Not. Good.

Wednesday, August 11, 2010

Miserly meal number two


Last night I made Jonni's baked chicken nugget recipe (page 102). Let me just tell you they were the BEST nuggets I EVER had!! So tasty and moist. The secret lies in the coating in mayo before the bread crumb mixture. I didn't measure any spices, just dumped in per my usual style. WOW At first the kids weren't too excited, guess they didn't have the look they expected nuggets to have. However it was love at first bite and every child ate them.

I used 2.5 lbs. of chicken breast to feed 7, and I am guesstimating it cost .72 per 4 oz. serving. Jonni's 2002 price was .67 so that's not too shabby for 8 years later. I actually got my chicken breast for a steal at 1.78/lb during peak grilling season. YEAH!

I also fried up some homemade french fries using 4 huge yukon gold potatoes. Prob. not the best potatoes for frying but they were very good!

So for 1.47 per plate, dinner was served.

I also threw in some green beans with margarine and almond slivers on top to round out the meal. Still under $2.00 each plate with the fancy green beans.

Monday, August 9, 2010

Miserly meal number one

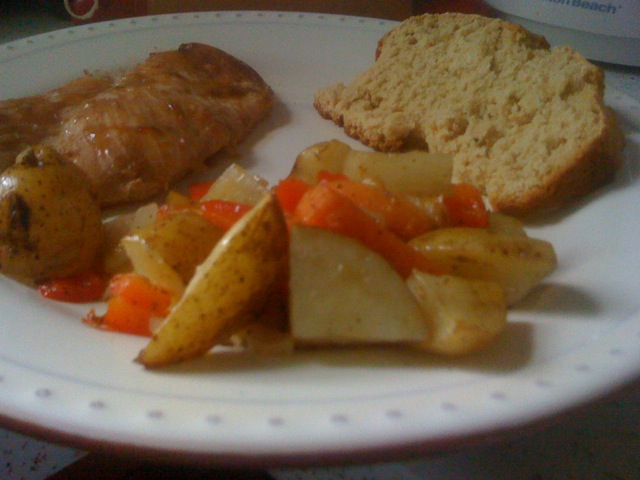
Tonight's menu is Jam chicken and oven roasted vegetables right out of Jonni McCoy's Miserly Meals. Also, I am making a beer bread to go along with it. This beer bread I had a good year or maybe even TWO *gasp!* It's still sealed and perfectly good, so I mixed it up and popped it in the oven. It looks GREAT!! The beer was even free because our landlord (the guy, not the wife...LOL) gave us 4 bottles last night because he didn't like these. They are from Great Lakes brewing Co. and honestly, I tasted some, it's kind of bitter.....so perfect for the bread hopefully ;-) I am not really counting the bread toward the cost of this meal since I have had it for so long.

For the Jam chicken on Page 80, Jonni says it's .66 cents for a 1/4 lb. serving. This was in 2002, however, my guesstimate for today based on my shopping is .88, which is not too shabby at all!

As for the oven-roasted veggies on page 72, .57 per 3/4 Cup serving is the winning number. According to my experience, it is more like $1.00, which we have to admit, is pretty decent.

I said I wasn't going to mention the beer bread, but for curiosity's sake (watch out cat!) the total batch is $4, with 14 servings, coming out to slightly over .25 per serving, (and no I am not obsessive) including the beer as if we had bought it. Honestly, WHO are they kidding??? This really is going to be 7 servings, so let's call it .50.

Here is a pretty little plate for a hungry tummy, for the grand total of $2.38. Of course, we are feeding seven, but when you put it that way, it sure puts things in perspective. Also, since the beer bread was free, we could just call it $1.88. WOW.

Thursday, September 10, 2009

Fall means the oven is back in business!!!

Very happy to have comfortable weather enough to once again employ the oven without wilting the entire household, I eagerly prepared some sandwich bread (we had none) along with cinnamon rolls for breakfast yesterday morning. The two littlest boys slept until almost 10 o'clock in the morning, much to my surprise!! As soon as the rolls were almost ready to pull out, the aroma roused them out of beds and beckoned the two downstairs. Their faces alight with merry surprise, they watched me slip the pan from the oven to the stovetop to cool. Below, is my roll making in pictures. ;-)


Start by rolling your dough out into a thin oblong shape


Spread the sauce all over top surface of the rolled out dough


This is the way we roll them up..roll them up..roll them up..


all rolled up nice and snug


all prepped, just after spooning extra sauce to the tops, and ready to rise


fully risen and ready to go into oven


fresh out of the oven


To make cinnamon rolls, take a basic bread dough recipe:

Basic Bread Dough
Yields:3 loaves

3 cups comfortably warm water
2T yeast
1/3 cup sugar
1/3 cup olive oil
1 TBSP salt
9 cups flour

I set this in my Bosch kitchen system on level 1 for a couple short minutes to knead. You can also knead by hand.

Then divide dough into 3 equal amounts. I usually make 2 loaves of bread and 1 batch of cinnamon rolls, but you may do it differently depending on your needs. I take the 2 portions and allow to rise covered, until doubled in size, in a place free of drafts. When risen, punch down, shape into two greased loaf pans and allow to rise a second time while you prepare and rise the cinnamon rolls. At the end, they can all go in the oven together, though the bread loaves will take an additional 10 minutes than the rolls.

Now onto the rolls:
Start a stick of butter to melt on low heat in a small saucepan. Add some brown sugar and cinnamon once it begins to melt and stir until dissolved and uniform. I then take my single portion and roll it out very thin in an oblong shape on a sparsely floured surface (to prevent sticking). Spread a good amount of the sauce all over the surface of the bread dough.

Prepare a lasagna type oblong pan with cooking spray.

Be aware: This will be a messy job! Roll up tightly as you can, length-wise as in the pictures above until all the dough is rolled like a carpet ;) Then slice in about 20-26 slices. I use an extremely sharp knife so that I can cut without flattening. I've also seen it done with floss. You can "loosely tie" the floss around the roll and pull to slice each portion from the roll.

Gently place the rolls into prepared pan and allow to rise in a warm place. I then spoon some of the leftover sauce atop each roll. What I do is preheat my oven to 350 degrees, and set the pan of rolls in the microwave above my stove to rise in a warm and safe place. In about 30 min. they will be risen, and you may pop them into the oven to bake for 20 min or until golden brown. Serious. Yum.

You could glaze with maple syrup, but I leave as is. They don't last long enough with the 8 of us to dry out.

Friday, August 14, 2009

~Taco Salad~

Our newest favorite salad this summer is Taco Salad. Try this recipe here that I first tried at our Junior High Mission trip in July of this year.

Ingredients

* 2 ripe tomatoes, diced
* can of black olives, sliced
* 1/2 pound shredded cheddar
* 1 large onion, diced
* 1 head romaine lettuce, shredded
* 1 pound lean ground beef, browned, crumbled and drained
* 1 cup Catalina salad dressing
* tortilla chips
* 1 cup salsa
Directions

Combine the tomatoes, cheese, sliced olives, onion, lettuce, and ground beef in a large bowl. Add the salad dressing and mix well. Just before serving, add the crushed up tortilla chips, tossing to combine with other ingredients. Add salsa to each serving if desired.

Thursday, June 18, 2009

Seashell Pasta Salad


This is my favorite pasta salad! It looks a bit funny because I had JUST made it, it hadn't set yet at all, but boy is it GOOD. Here's the recipe:

1 tomato, diced
6 green onions, diced
2 stalks celery, diced
1 C. Mayo
1/4 C. French dressing
16 oz. pkg of small seashell pasta, cooked
1/2 C. bacon, chopped small
salt and pepper to taste (I didn't use any)

Combine veggies in large bowl. Set aside.

Whisk mayo and dressing, pour over veggies

Add remaining ingredients; mix well.

Cover and chill~

Let me know if you try it

Monday, May 18, 2009

It's been awhile......AGAIN

I am such a slacker blogger lately! I have been feeling like time is getting away from me. There just have been so many appointments, part of the territory with children in general, never mind when there are special needs involved. I have a standing play date once a week with an old-time friend of mine, and preschool co-op once per week with Aiden, let's not forget one swimming lesson per week for all four boys (getting the most out of one stone there!!), and AWANA on Wednesdays, and we have some type of get together once per week. I have also been babysitting two full days per week for the last 6 months.

It doesn't sound like too much for a family of 8, but the next thing I know it is afternoon, time to pick little boys up, and the snowball is rolling faster right up till bedtime. I feel like I can barely keep up, and the house is never quite the way I would like it to be running. WHEW...blogging has fallen to the wayside. I don't know how those "supermoms" do it. I just want to be at home with nothing extra to do for a solid week (grin), putter around our house, arranging things, messing with the garden and not fearing having enough time, get to all those little things that really make a difference, and that I have been really missing lately.

Today is a mental health day. I cancelled a dentist appointment, and I am not sorry. We will be home all day doing what needs doing, and every other day this week we are busy. I'm going to get lots of laundry put away, counters cleaned, rooms freshened up, read some of The Pursuit Of God by A.W. Tozer, breathe. Tonight I'm going to take my time and cook something with joy and hope Mike will be home to partake with us. Maybe we'll even break out a game, though I enjoy a game without little pieces to worry about, say charades. hmmmmmmm......
I hope to have some pictures of *something* to share next time.
Have a beautiful week~

*update 6:27pm*
Just realized that we missed the swim lesson today. I am not one bit sorry. Dh reminded me a few minutes ago, and I honestly forgot all about it. I SO needed this day at home to do what needed to get done, to refresh myself with reading etc,... and to be able to make a really nice dinner with my love put into it and family time rather than the usual (lately) irritation while trying to cook something mediocre and eat it fast enough to get out of the house and to wherever on time, and then to arrive back with no time or energy for homework. I wish I could have more days like this. Weird thing is all winter long we didn't do much, but I was lonely and bored to tears. I need some balance and some down time more often.


I came up with this version of chicken parm tonight, plugged into a nutritional calculator and it came up to 454 calories per serving, so I am quite pleased with myself. It was actually delicious as well, and the info input is saved for easy tracking next time I make it. =)

Here's the recipe:

trim chicken parmesan


Ingredients


1 lb. of whole wheat pasta

3 pieces of chicken breasts

1 cup panko bread crumbs

1/2 cup romano cheese

1/4 cup shredded parm cheese

1 Tbsp granulated garlic

1 TBSP basil

1 tsp dried parsley


Nutritional Info


Fat: 9.8g
Carbohydrates: 48.4g
Calories:453.4
Protein: 42.9g


Set a pot of water with a pinch of salt over medium high heat to boil for the pasta. Add the pasta once boiling, and cook according to package instructions. When done, top with 1 cup of the sauce and divide up between six plates with a piece of the done chicken.

Take 3 pieces of chicken breast and butterfly cut them so you have six thin pieces. You may also use mallet to flatten if you have very thick pieces.

Next, mix 1 cup plain panko bread crumbs with 1/2 cup romano cheese. Add 1 tsp dried parsley, 1 Tbsp basil and 1 Tbsp granulated garlic. Take chicken and coat in this bread crumb mixture.

Line 9x13 baking dish with parchment paper. Add the coated chicken so they are not over lapping.

Top each with an equal amount of the half cup of sauce, then equally top each piece of meat with the 1/4 parm cheese.

Place in 375 degree oven 20 minutes or until cooked through.

Number of Servings: 6